Enabling BitLocker on Windows

Introduction
BitLocker is a built-in encryption feature in Windows that helps protect data by encrypting the hard drive. For users seeking to secure sensitive data, BitLocker is an essential tool. The good thing about using BitLocker is that it is built right into Windows, meaning you don't need to download and install any third party software. For most users, BitLocker offers an acceptable level of protection in cases of theft or hardware loss. For example when your laptop is lost or stolen.
Enabling 256-bit Encryption with Group Policy Editor
Prerequisites
— Windows Professional or Enterprise edition.
— TPM (Trusted Platform Module) version 1.2 or later.
Default vs 256-bit Encryption
— Default Encryption: BitLocker uses AES (Advanced Encryption Standard) with a 128-bit key by default.
— 256-bit Encryption: Opting for AES with a 256-bit key offers stronger security, making it more resistant to brute-force attacks, but remember to use a strong password. Many marketers casually refer to this encryption mode as military grade, but we suggest you read the military grade section of the Keycrypt documentation for a better understanding on what it actually means.
Steps
- Open Group Policy Editor: Press
Win + R then type gpedit.msc and press Enter. - Navigate to BitLocker Drive Encryption: Go to
Computer Configuration → Administrative Templates → Windows Components → BitLocker Drive Encryption. - Change Encryption Method: Select the drive type, then double-click
Choose drive encryption method and cipher strength.
Enable then select AES 256-bit.
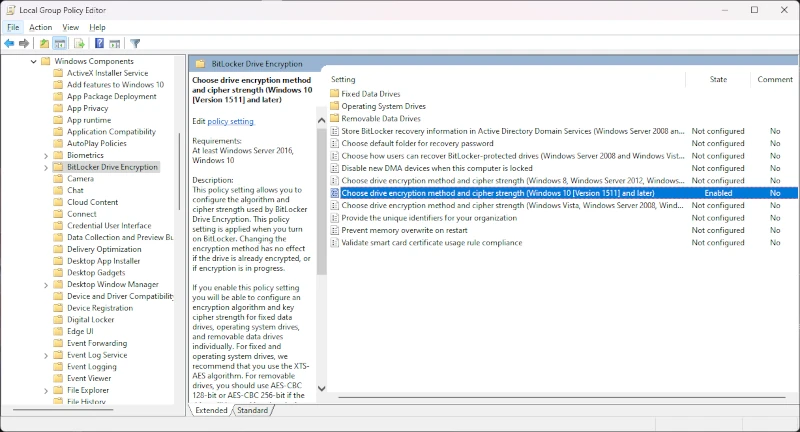
Group Policy Editor: BitLocker Settings (Windows 11, Professional Edition)
Once you've set up the Group Policy, go to Start → Settings → Privacy & security → Device encryption → BitLocker drive encryption to turn it on for your PC.
An important caveat
This setting will not affect any drives or devices that are already encrypted with BitLocker in 128-bit mode. To enable 256-bit AES on already encrypted devices, you'll need to change the group policy settings, then:
- Right-click on each encrypted drive: Disable BitLocker
- Wait for the decryption process to complete
- Right-click on each drive: Enable BitLocker
Enabling BitLocker on Windows Home Edition
Using Device Encryption
— Only available on devices that support InstantGo and TPM 2.0.
— Offers a simpler version of the BitLocker encryption.
Steps to Enable
- Open Settings: Press
Win + I. - Go to Update & Security: Select
Update & Security. - Device Encryption: Navigate to
Device Encryption. If it's available, you'll see the option to Turn On.
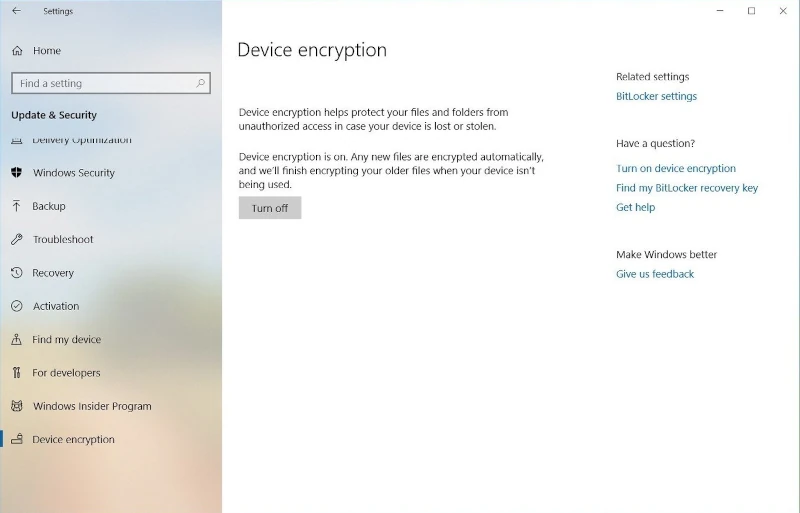
PC Settings: Device Encryption (Windows 11, Home Edition)
Contingencies
When securing your PC with BitLocker you are given the option of uploading a recovery key to your Microsoft account. This may not always be ideal since the convenience offered by a cloud backup comes with several security drawbacks. If you opt to avoid the cloud backup your family and associates will not be able to access your PC in the event of your death. In this case consider other contingencies, for example you could use Keycrypt to securely prepare and distribute physical shares of your encryption passphrase to family members or business associates.
Conclusion
Using BitLocker or Device Encryption on Windows is an effective way to protect your data. By following these steps, users can ensure their sensitive information remains secure in case of hardware loss or theft. In a future how-to I'll show you how to install and enable higher security alternatives to BitLocker. See you then.